

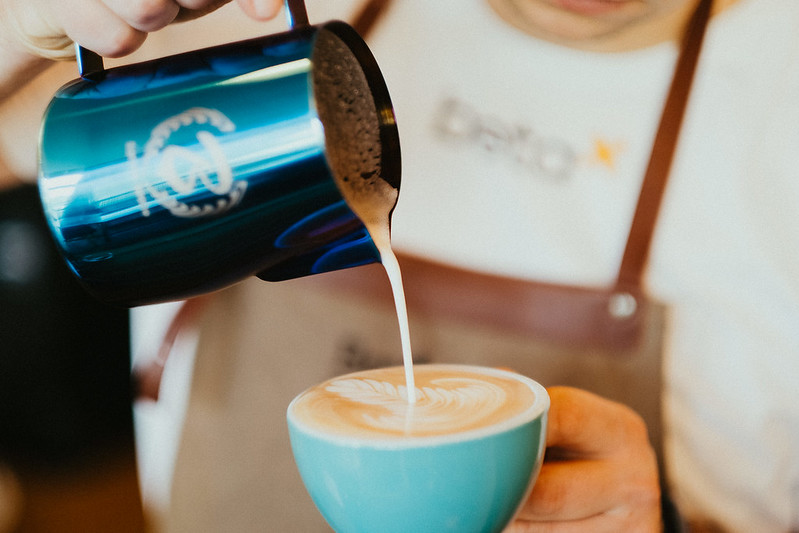
Sight plays a significant role in the overall sensory perception. We often say that food or drinks ‘look appetizing’. Watching videos or photos of beautifully served dishes or rich and nicely presented coffees often makes us drool and get hungry. Therefore, from a marketing perspective, every café or restaurant should pay attention to the presentation of their products. We eat and drink with our eyes, it’s a fact as old as the hills. Once I tried an experiment on an unsuspecting friend: I brewed a double espresso, poured it into two cups, then frothed milk in a large jug and made two coffees. One was decorated with a beautiful pattern, the other was plain. Which do you think they liked better? Of course, the one with latte art, even though both coffees tasted identical! Conclusion? I also find myself automatically assuming higher quality of the product when I’m served a cappuccino with a pattern at a café. After all, if the barista went to so much trouble to learn to draw on coffee, I have every right to believe that they are equally meticulous about the quality of every aspect of their work behind the bar. What’s more, to make nice latte art you don’t have to be a master of fine arts, but you need to know how to froth milk perfectly – to make it smooth, shiny and naturally sweet – and this guarantees a tasty cappuccino or flat white.

How to make perfect latte art? All you need is five years of study at the Academy of Fine Arts and a few years of practice. I’m joking, obviously, but the grain of truth in this is that only practice makes perfect. Turn on your coffee machine, prepare the jugs, a clean, damp cloth, a supply of milk, turn on ‘Eye of the Tiger’ and off we go.
EQUIPMENT
What will you need? Jugs, i.e. pitchers. How to choose the best one? In this case, the brand does the job. If you buy a ‘branded’ jug, you can be sure that the quality of the product will be top notch. It is important because a slight curvature of the spout is enough to make performing latte art much more difficult. It does not mean that a random jug from a non-specialized store can’t be a real gem, but in this case you must, firstly, be lucky, and secondly, know what spout is perfect for drawing on coffee. To this day, I recall my beloved jug bought for a few zlotys in a supermarket. It’s better not leave everything to chance but rely on good craftsmanship and quality of brands such as Barista Space, Motta or Rhinowares.
MILK
You can froth any milk, but the quality of your foam will depend on the type of the milk you choose. Fat and protein like to go hand in hand, so the fatter the milk, the more proteins it has, and this creates and stabilizes the foam. During frothing, two processes take place: steam generated under high pressure and shot through small holes in the nozzle aerates and heats the milk. We want both processes to take place simultaneously. In cold milk, proteins form tight bundles, but once heated, the proteins wrap around the air bubbles (like protective blankets), creating unique foaming properties. It is important not to overdo the temperature, though, because too much heat will denature (break) the protein – you can forget about smooth foam, all you’ll get will be large, dry bubbles. Temperature will also make your milk sweeter: heated long chain carbohydrates break down into simpler sugar, easier to digest.
If it’s cow’s milk, make it full fat, rich in protein, but what about other options? We live in wonderful times, currently the market offers a very large selection of plant-based milks, which are not only delicious, but also foam great! When you choose one, pay attention to the amount of proteins it contains. Personally, I recommend trying Oatly Barista – it is creamy, it foams beautifully and you can conjure up a lot of patterns with it! It is also worth choosing pea milk from Sproud or oat milk from Rude Health or Natumi.
HUMAN
Yes, the most important link. You can have the best equipment and milk consisting only of protein, but without practice and training you can only dream about beautiful latte art. The beginnings may be tough, but believe me, when you draw your first rosette on coffee, you will remember this moment for a long time and you will be eager to train more. At the beginning, a few important rules.

Without well-frothed milk, you will not draw a perfect pattern. Why? Any visible air bubble will move from the milk to the cup, too much aeration will change the texture not to your liking. Well-frothed milk will look like yogurt – uniformly smooth and shiny, which will make it possible for you to pour any pattern from the jug in the cup. How to do this? First, brew an espresso. Then start frothing:
- Pour cold milk into at least half the volume of the jug. The smaller the amount, the more difficult the foaming is, due to the rapidly rising temperature.
- Pass the steam from the nozzle into the drip grid of the machine – after a longer standstill, some water will always flow, and you don’t want to thin out the frothed milk. Wipe the nozzle with a damp microfiber cloth.
- Immerse the tip of the nozzle in the milk jug – there should only be steam holes under the surface.
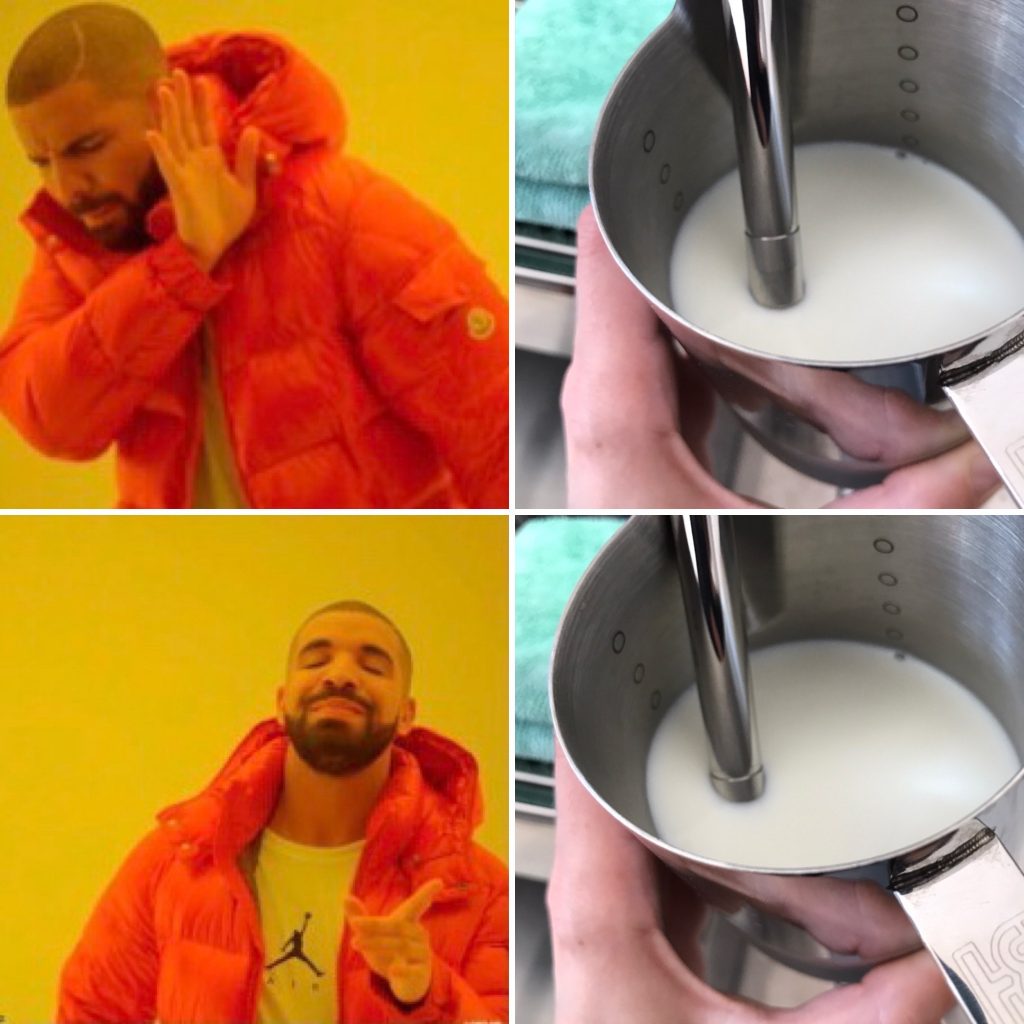
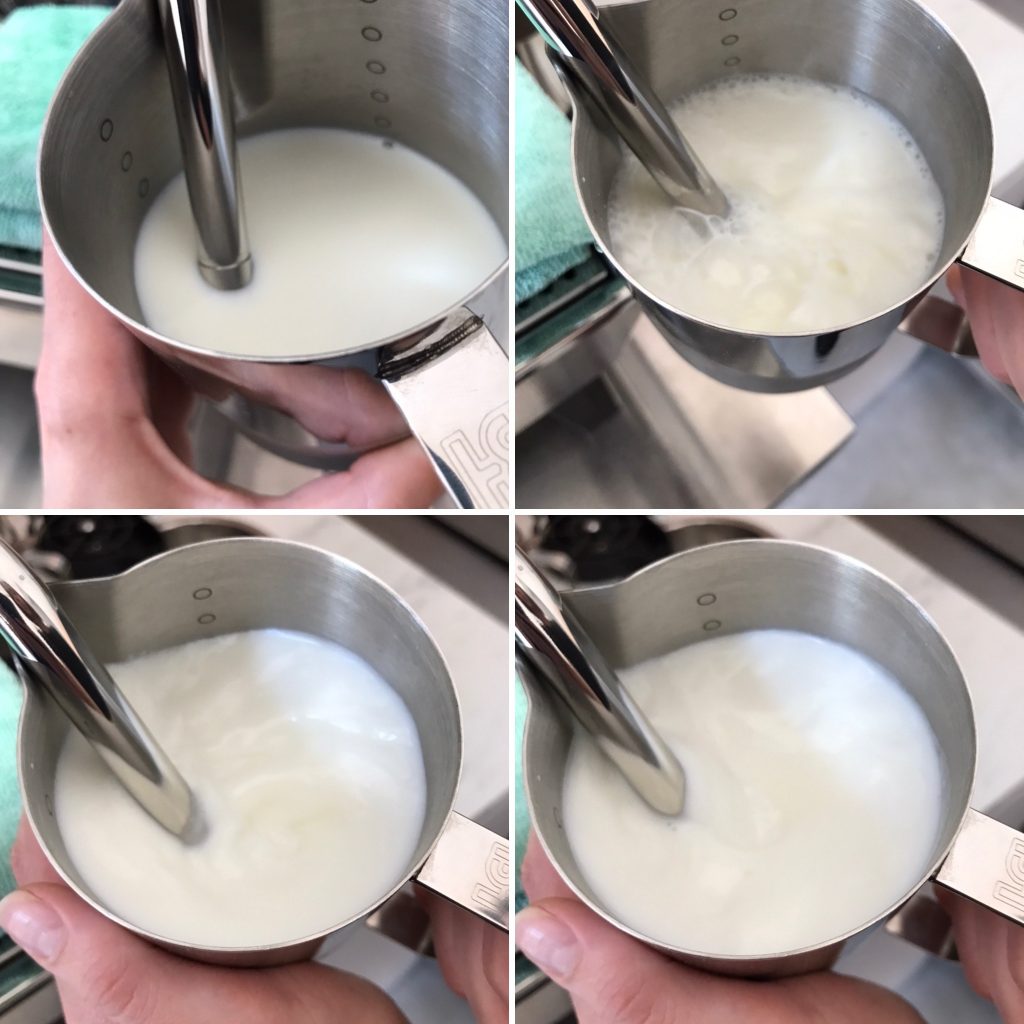
- Release the steam and focus. First you need to aerate the milk, it has to almost double its amount, but you don’t want to add large bubbles, only tiny air bubbles under the surface of the milk. For this to work, you must not let the tip of the nozzle come out, keep it just below the surface. If the nozzle is exposed, you will add too much air in the form of ugly bubbles, if you dip it too deep, you will hear an unpleasant squeaking-howling sound instead of a nice hissing sound and it will not aerate the milk at all.
- Now, before the milk reaches the desired temperature (maximum 65⁰C), you have another few to several seconds (depending on the machine and the amount of milk) for the so-called ‘clarifying’ or ‘polishing’ of milk. It is a process which gives a shiny, smooth texture to the frothed milk, during which you have to create a vortex on its surface. The steam coming out of the nozzle under high pressure moves the milk fairly dynamically, but you can tame it. Each barista has their own methods, but let’s start with the simplest one – you need to aim the nozzle in the right place (between the wall and the center), not perpendicularly, but at an angle which makes the milk move in a circular motion. Air is lighter than milk, so if you don’t mix them well together with the steam, the bubbles will rise to the surface and instead of a velvety texture you’ll just get a blotchy foam on top, which is useless for drawing. When you feel that the jug gets hot, it’s a sign that the target temperature has been reached and you need to turn off the nozzle immediately.
- After removing the nozzle from the milk, clean it thoroughly with a moist microfiber cloth and direct the steam into the drip grate of the machine.
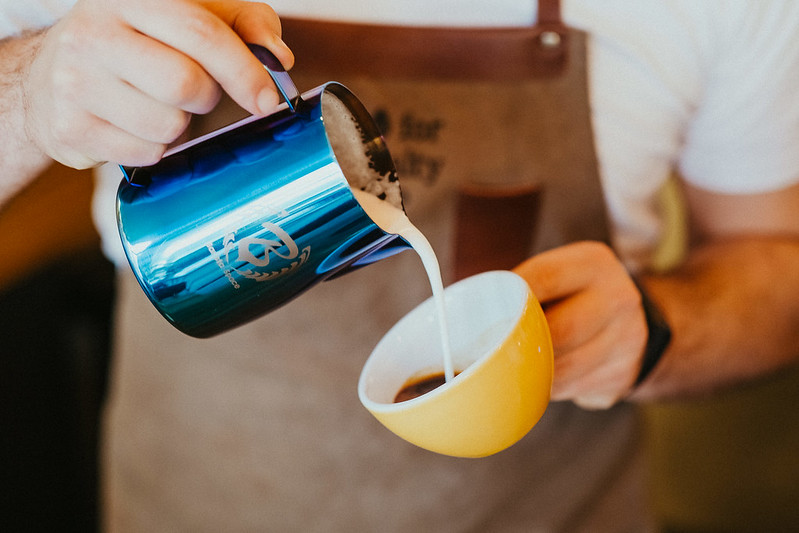
Time for art! It is best to start your adventure with latte art with the basics. There are three patterns that are the parents of the others: a heart, a tulip, and a rosette. From the compilation of these, you will create absolutely anything that your imagination tells you. Ask Agnieszka Rojewska or check on Youtube, you can draw absolutely anything on coffee. The beginning for each of the patterns is the same – you need to create a ‘foundation’, that is, mix the espresso with a spherical movement of the cup with a touch of frothed milk poured from above so that the foam does not escape. Before taking the next steps, stir the jug so that your milk does not stratify – you want a uniform, dense texture. The next moves depend on the pattern you want to get:
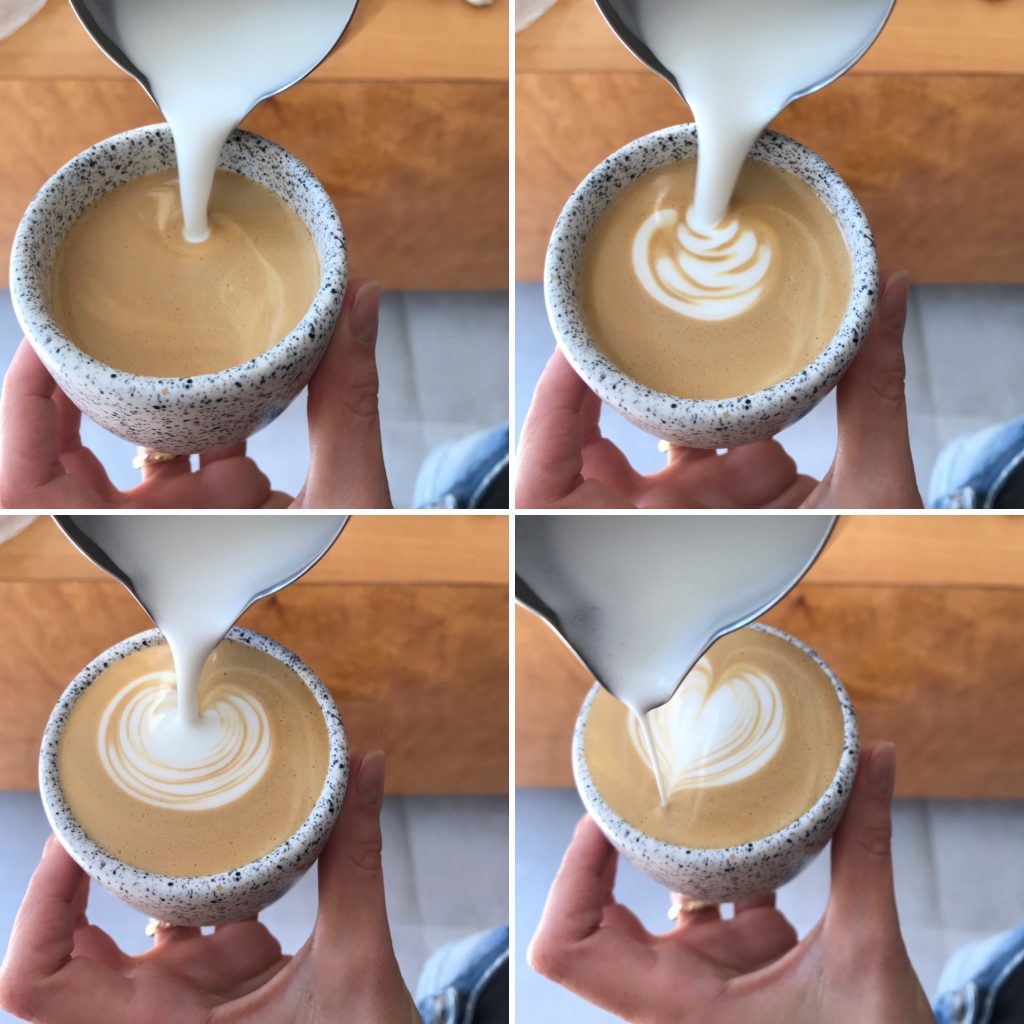
HEART
After creating the foundation (mentioned above), slowly pour the milk, and when the cup is full to 3/4 of its volume, lower the jug and tilt it more to start drawing – you can use quick movements to the sides, or just tilt the jug, aiming at the center of the cup – a spherical white spot should appear. When the coffee level is close to the edges, cut the pattern with a quick flick of the pitcher in the direction the spout is pointing, while lifting it up (a bit like a plane taking off). This will turn the white circle into a heart.
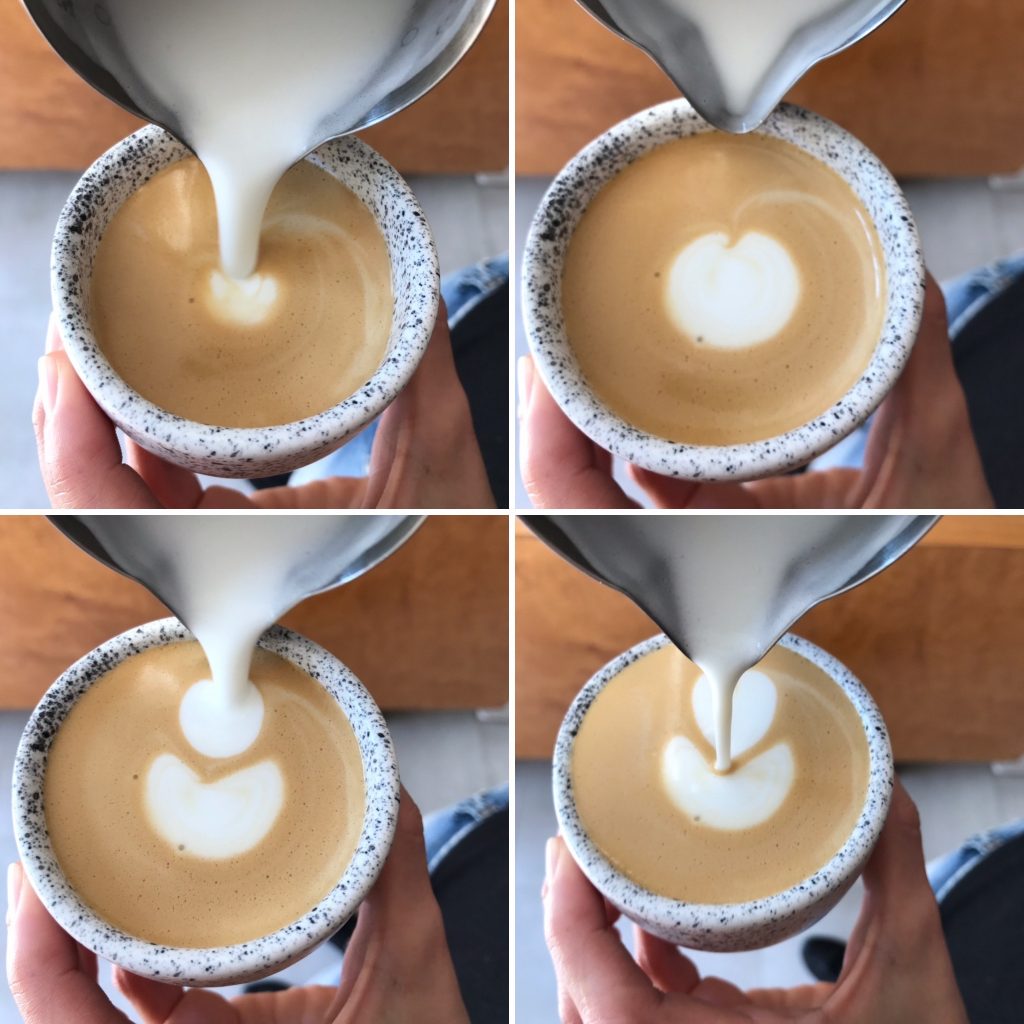
TULIP
It’s basically a multiple heart. The beginning is exactly the same – first pour the milk itself to ¾ of the cup’s volume, then make the milk circle by tilting the jug, but this time you just want a small stain. You lift up the jug (completely, so as not to spill any drop of milk) and then make another spot over the first one. Finish the pattern as for the heart, cutting both elements with a thin stream line, while lifting the jug. Of course, a tulip can consist of more than two hearts, remember – sky is the limit!
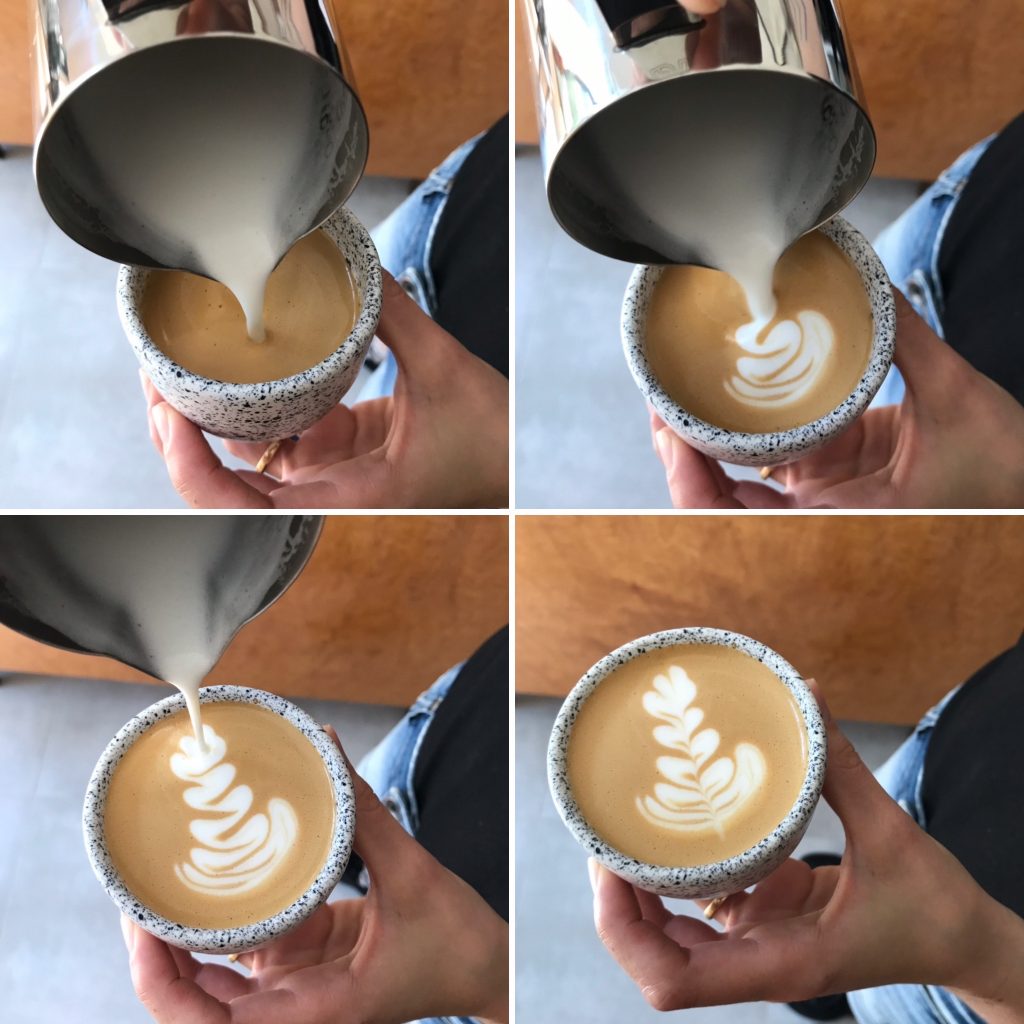
ROSETTE
The most difficult, but also the most rewarding. After mixing the foundation and filling the cup about halfway, try to draw a pattern with rhythmic movement of the jug to the sides. Start closer to the left side of the cup, not in the middle as before. When you see the first white streaks, move the jug towards the right (like you wanted to make the longest line) with a stable, vibrating movement, and when you reach the edge, finish the pattern like the previous ones – cutting it through with a thin stream line (the pitcher taking off).
All is good in theory, don’t worry if you don’t get it right the first time. Protip for everyone who wants to practice: water with a splash of dishwashing liquid foams great, and you can also draw with it. It’s not that pretty and durable, but it’s enough to learn the basic moves.
It is worth improving your skills not only in the field of sensorics and brewing, but also when it comes to visuals. Let’s take care of all the senses. Let’s get to work!


